Face Recognition Using Transfer Learning
Face Recognition Using Transfer Learning

“The best way to enhance security is through facial recognition — it’s going to be the standard very soon.” ~Kesha Williams
Face recognition is a method of identifying or verifying the identity of an individual using their face. Face recognition systems can be used to identify people in photos, video, or in real-time. Have you ever wondered How your mobile face lock system works ?
Behind the scene , Deep Learning and Machine Learning are working on it . CNN is one of the part of Deep Learning which is used for object detection, segmentation, recognition.
If we want to do a Facial Recognition system from scratch , there are certain challenges we will face.
- The first and foremost thing is data collection . For building a facial recognition model from scratch we need plenty of image datasets.
- The second thing is we need to process the images in order to fit those images into our model.
- For training those deep-learning model , our system will need more CPU/GPU and RAM . For that we need to invest more money for hardware's or cloud computing.
- Even if you invest in that , if there is a new set of images comes in play we need to retrain our model from scratch which is a hectic task . Isn’t it ?
So in-order to get rid of those things , here comes the concept of Transfer Learning.
Transfer learning is a machine learning method where a model developed for a task is reused as the starting point for a model on a second task. Its has three steps.
- Select Source Model. A pre-trained source model is chosen from available models. Many research institutions release models on large and challenging datasets that may be included in the pool of candidate models from which to choose from.
- Reuse Model. The model pre-trained model can then be used as the starting point for a model on the second task of interest. This may involve using all or parts of the model, depending on the modeling technique used.
- Tune Model. Optionally, the model may need to be adapted or refined on the input-output pair data available for the task of interest.
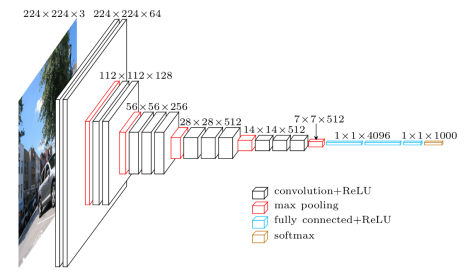
In this demo we are going to use VGG 16 architecture and weights from image-net datasets. Lets start coding

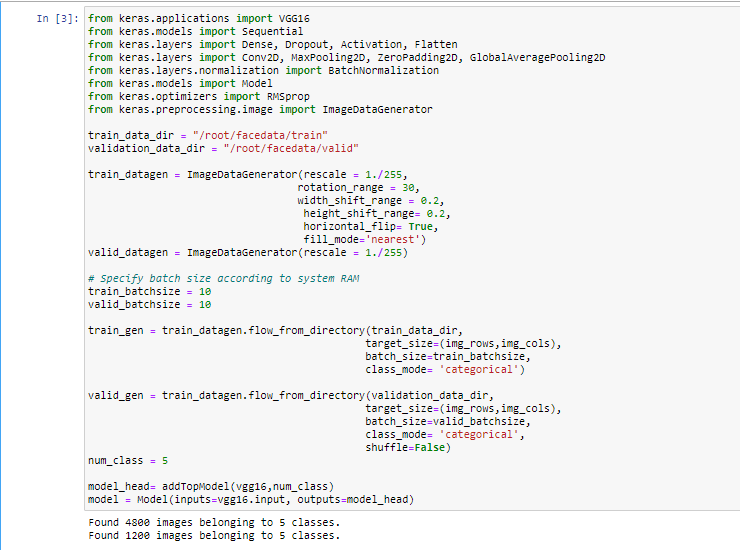
Step 1 : Collect Datasets for training and validation
- The below piece of code will capture image using webcam , detect the face using Haarcascade model , crop the image and store it in separate folder for training and validation.
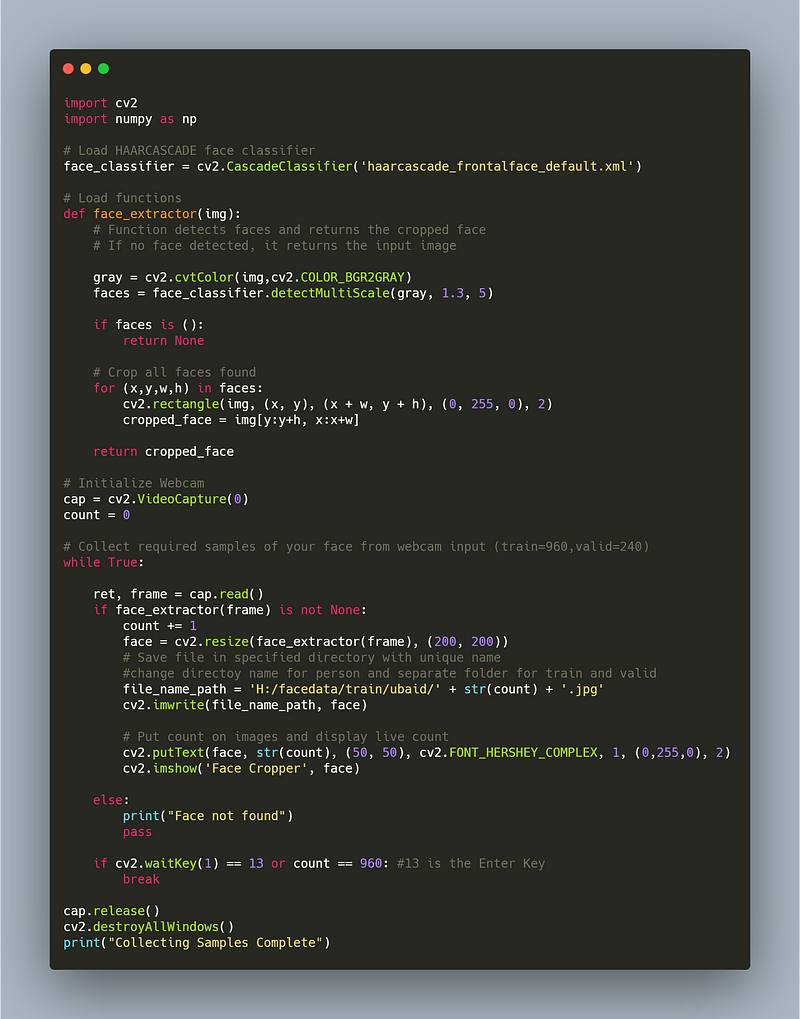
- For this demo I have collected images of five persons . From each individual I have collected 960 images for training and 240 for validation 80:20 percentage.
Total image → 1200
Training → 960
Validation → 240
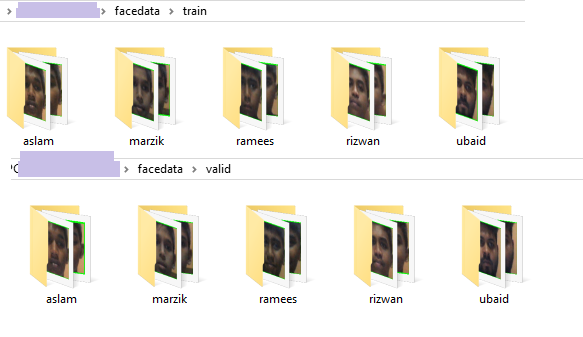
- If you give proper folder details , you can see the image stored in the training and validation separately.
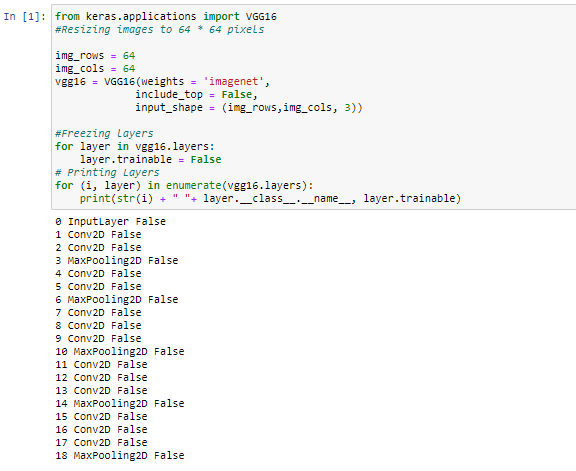
Step 2: Import the VGG16 modules and freeze the layers
- In the below code snippet we are importing VGG16 module from keras package . Behind the scene Keras using TensorFlow.
- After importing modules we are creating object and store it in vgg16 variable.
- Finally we are freezing the layers by setting layer.trainable=false
Step 3: Adding a Top model for fine tuning our need
- Here we adding Fully connected Dense layer with a dropout of 0.3 to reduce over-fitting .
- For activation of output layer we are using Softmax classifier.

Step 4: Image Augmentation to increase dataset size
- As we already discussed , the Deep learning model needs more data for training . In typical modern environment in some cases we can get the datasets sometimes but not always.
- In order to solve this issue , here comes the importance of augmentation . In this technique we can flip , rotate, shear,zoom image on the fly while training.
- Keras ImageDataGenerator() function will do the augmentation , as we discussed above.
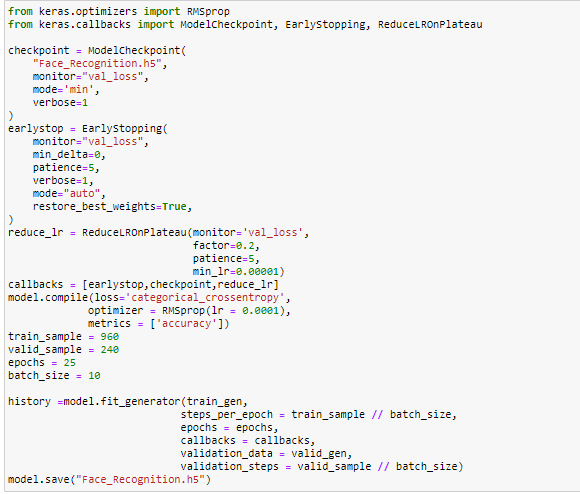
Step 5: Training model
In training model step we are using 3 callbacks ModelCheckpoint, EarlyStopping, ReduceLROnPlateau methods.
- ModelCheckpoint → To save model/weights in checkpoint file . So that model/weight can be trained from saved state.
- EarlyStopping → Allows you to specify the performance measure to monitor, the trigger, and once triggered, it will stop the training process.
- ReduceLROnPlateau → It monitors a quantity and if no improvement is seen for a no.of epochs , the learning rate is reduced (i.e In our case 0.0001 to 0.00001)
RMSprop is an optimizer for optimizing our model performance and get rid of Gradient Explosion and Vanishing.
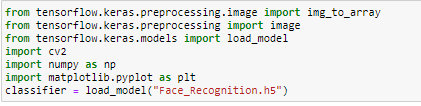
Step 6: Testing the model Real Time using webcam
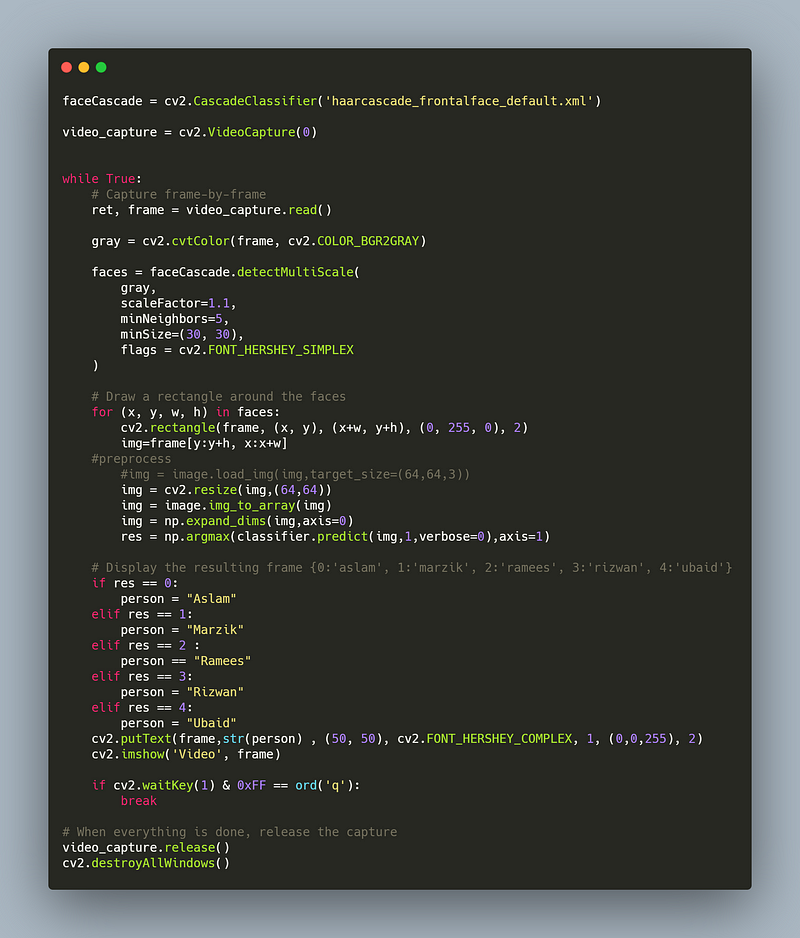
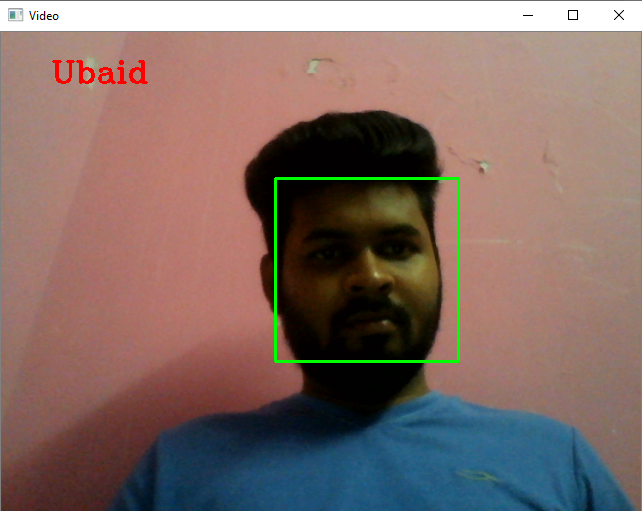
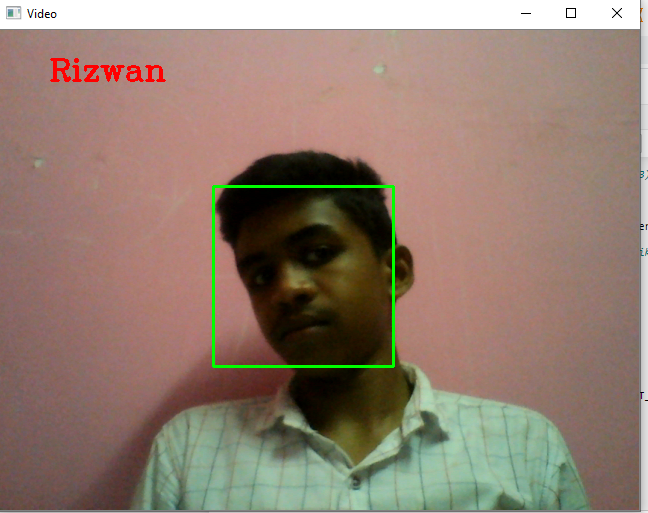
‘Voila!’ Our model recognized images in real time successfully.

Further Improvement:
- This training steps , checking accuracy , retraining , fine tuning and final deployment in production can be fully automated by condition driven method by integrating using Mlops. Refer my previous article for how to automate task
In recent days many companies decided to invest in machine learning for intelligence and insights. They are recruiting…medium.com
Complete Jupyter Notebook for your reference
I hope you enjoyed this article. Please share your valuable feedback and collaborative ideas.
Keep Learning …..
Keep Sharing …..


No comments:
Post a Comment