Lets Deploy our web-server from Git2Docker
Lets Deploy our web-server from Git2Docker

“It is not the strongest of the species that survive, nor the most intelligent, but the one most responsive to change.” ~Charles Darwin
Every IT professionals should have come up with terminology like git, source control management, version control . It is vital to at least know about the basics of the things. Here, It is another one article to automate everyday task of a developer or an operational guy.
This article will give you step by step approach to automate your web server provisioning , version control, code deployment, Quality test everything from git to docker End to End automated.
In this process below are the tools which we are going to work with
- Github
- Apache Web-server
- Docker
- Jenkins
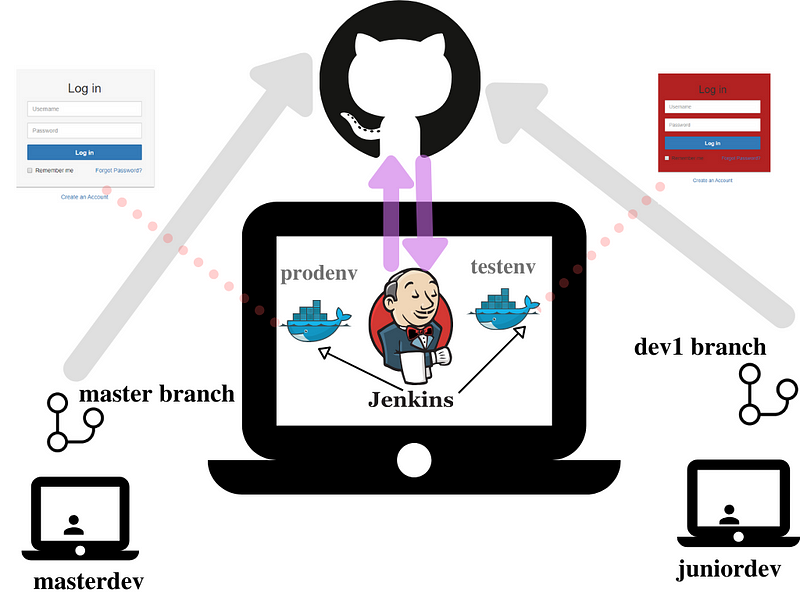
I hope you would have got an overview of the workflow . In this workflow , we are going to create 3 jobs in Jenkins which automate the task . Lets see the detailed description of workflow.
JOB 1
- Whenever the developer push the code to Github in dev1 branch , our system(Jenkins) should automatically pull the code and deploy the code in Test Docker Environment(testenv).
Git(Dev1 Branch) → Docker(testenv)
JOB 2
- If Developer push to master branch , then Jenkins will fetch from master branch and deploy it on Production Docker Environment(prodenv).
Git(master Branch) → Docker(prodenv)
Note:
Both test-docker and master-docker environment are on different docker containers.
JOB 3
- Manually the QA team will check (test) for the website running in testenv. If it is running fine then Jenkins will merge the dev1 branch to master branch and trigger job 2 (i.e., launch Production Docker Environment prodenv )
Lets start building our job flow
Step 1: Create Job 1 for deploying code of dev1 branch
- Create a folder named test to store the code from dev1 branch
mkdir /root/github/test
- Create a new freestyle project in Jenkins Dashboard and name it as Job 1
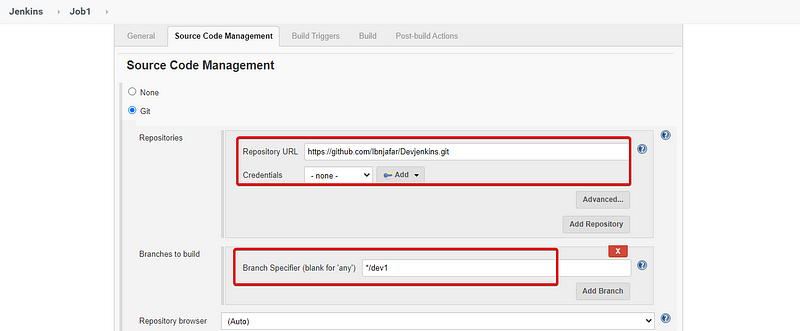
- Add the Github repository URL in the source code Management and give credentials if it is a private repository
- Specify the branch you want to build . In my case, its dev1 branch.
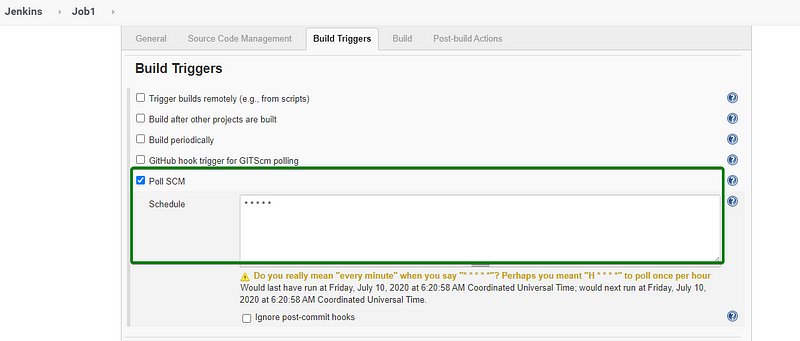
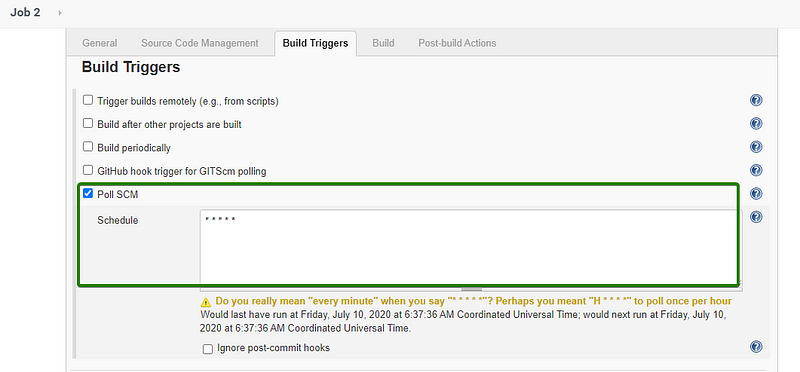
- In Build Trigger section , select Poll SCM and schedule job for every minute( * * * * * ) .
- This means for every 1 minute , Jenkins will check your dev1 branch , if there is any change in code it will start pulling the code and start deployment.
- This step can also be done by selecting Github hook trigger . For that we need to create a hook.
- In the Build section, write the code for automation.
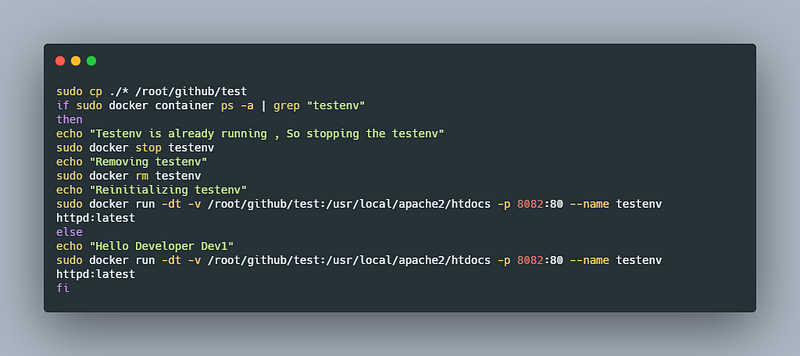
- It is a bash shell script , will do the following things
- It start by copying the code from Jenkins workspace to our directory(/root/github/test)
- Then it check whether container running with name “testenv” . If the container runs, it will terminate the container and launch the docker container (apache webserver ) and deploy the code in it .
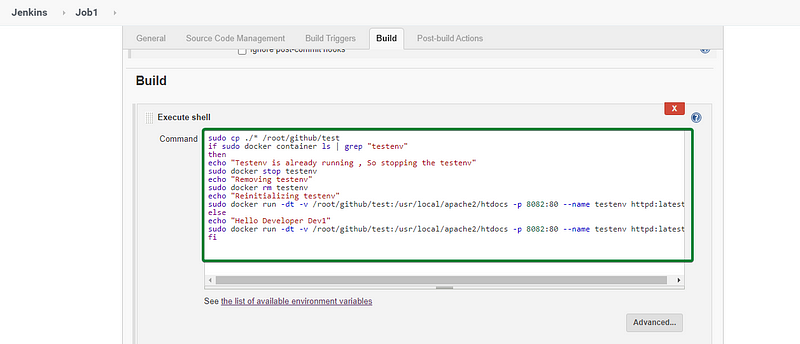
- Job 1 Build code for your reference
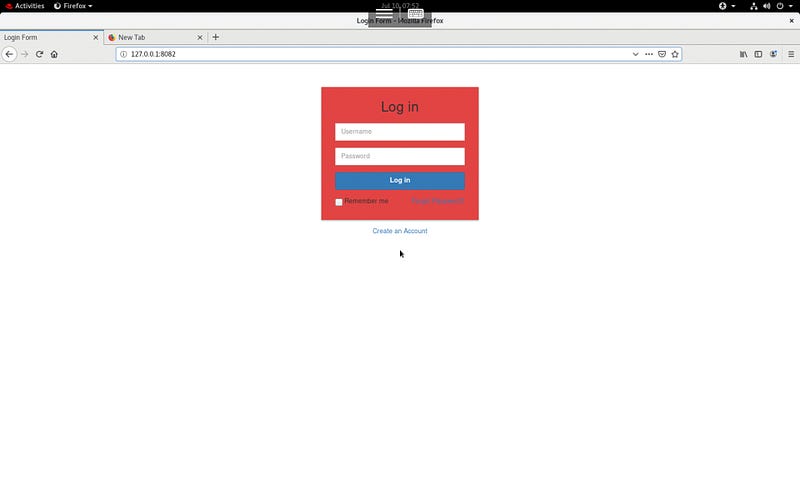
- Click the build icon . If the build completed successfully , we can access the web-server through the link http://ipaddress:8082
Step 2: Create Job 2 for deploying code of master branch
- Create a folder named prod to store the code from master branch
mkdir /root/github/prod
- Create a new freestyle project in Jenkins Dashboard and name it as Job 2
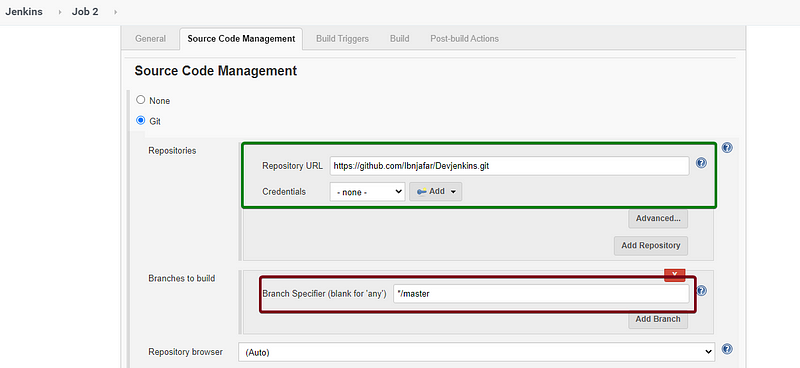
- Add the Github repository URL in the source code Management and give credentials if it is a private repository
- Specify the branch you want to build . In my case, its master branch.
Step 2 : Create Job 2 for deploying code of master branch
- Create a folder named prod to store the code from master branch
mkdir /root/github/prod
- Create a new freestyle project in Jenkins Dashboard and name it as Job 2
- Add the Github repository URL in the source code Management and give credentials if it is a private repository
- Specify the branch you want to build . In my case, its master branch.
- Create Poll SCM , similarly as we did in the Step 1
- In build section, write the shell script for deploying web-server in prod environment.
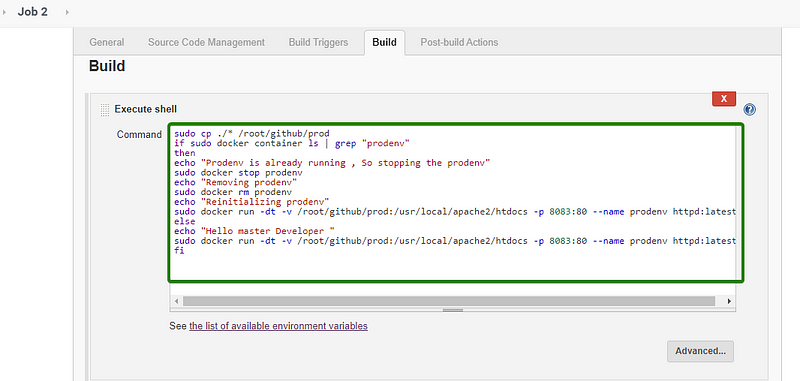
- Job 2 shell script code for your reference:
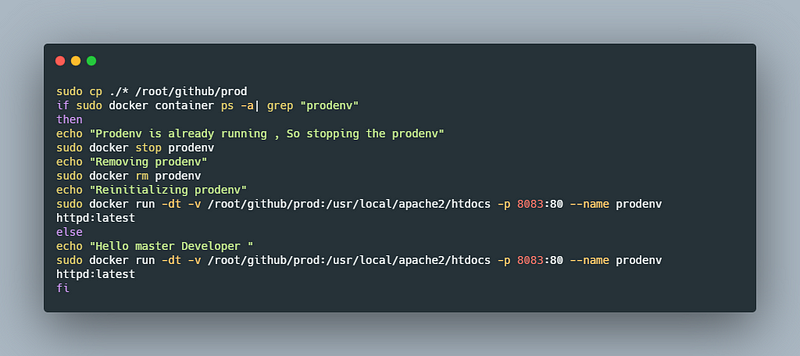
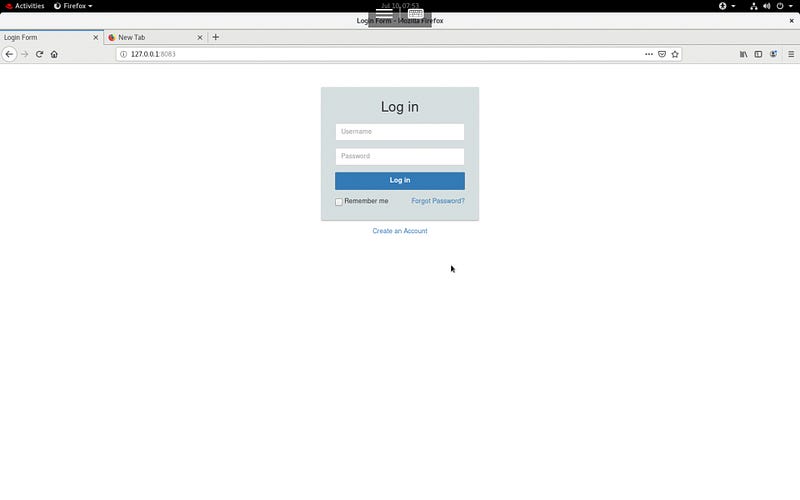
- On successful build, we can access the webpage through URL http://ipaddress:8083
NOTE:
For simplicity and easy understanding , I have changed only the background color of my webpage . Github repo for your reference
Prod → master branch → Background color ( Light Grey) → Port(8083)
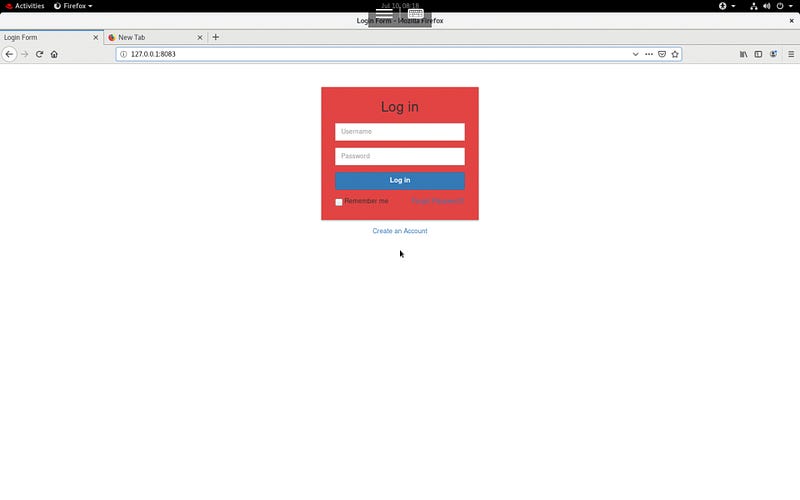
Test → dev1 branch → Background color ( Red) → Port(8082)
Step 3: Create Job 3 For QA Team Test and merging dev1 with master branch
- Add the GitHub repository URL and specify dev1 branch which need to be merged on approval from QA Team.
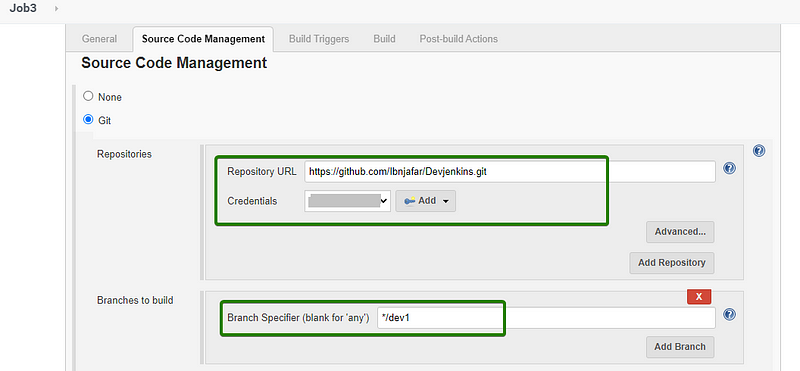
- In the SCM , click additional behavior and specify branch as master.

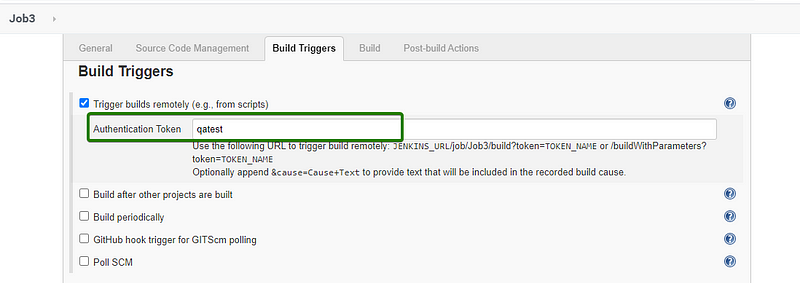
- In the Build Triggers section , select option Trigger builds from remotely option and enter the token name(This need to be kept confidential )
- The trigger URL can be shared to QA team for triggering the build if the dev1 branch code is suitable for prod environment.
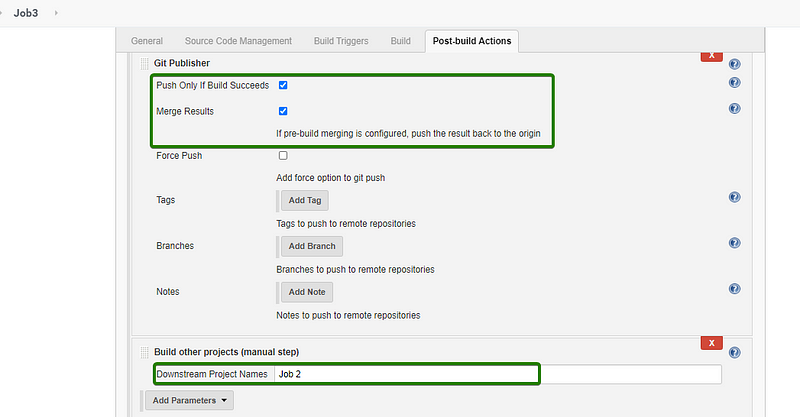
- In Post-build Actions under Git Publisher select the options as shown in the demo .
- If QA team approves and build the trigger through URL which we shared , it will merge the dev1 branch with master branch and reinitialize JOB 2
http://ipaddress:8080/job/Job3/build?token=qatest
- If the Job 3 built successfully , we can see that our dev1 branch code got merged with master branch and we can see the updated prod environment which we can access through URL http://127.0.0.1:8083
- After job creation, you can see the Jobs and their build status in the Jenkins Dashboard like this

Further improvement:
- Docker deployment can be further automated and made replicated with full orchestration using Kubernetes .
- Instead of manual QA testing , code testing can be automated.
- Container Configuration can be well automated using Ansible.
This repository contains code for task and project that undergone during Devops-Assembly-Lines Internship. Whenever the…github.com
“The key to following the continuous delivery path is to continually question your own assumptions about what’s…medium.com
Hope you liked the content (:
Please provide your collaborative ideas , suggestion and valuable feedback’s.
Keep Learning ! Keep Sharing!


No comments:
Post a Comment