Deep Learning- MLGit2Docker End to End Automation
Deep Learning- Git2Docker End to End Automation
In recent days many companies decided to invest in machine learning for intelligence and insights. They are recruiting more talented Data scientists, ML Engineers to solve business problems using AI. If you are hired as a Data Scientist or ML Engineer, you will start analyzing business problem and come up with a model by solving all advanced x-science and y-math problems, tune it to get to the desired accuracy and will plan to deploy it in production environment.
Its looking very simple right. But in real case scenario it is pretty hard. Do you know as a recent report from Deeplearning.ai says “only 22 percent of companies using AI/Machine Learning have successfully deployed a model” .
Here comes the importance of MlOps. It is a compound of machine learning and operations. Similar to Devops approaches, Mlops looks to increase automation and improve the quality of production ML.
In these article, I will show you how to automate all the tedious task in Mlops cycle using step by step approach from Git to Deploying our final model in Flask application.
Workflow of this task:
- Initially we will start by Creating a docker image with preinstalled libraries, which are needed for the model creation , training, hyper parameter tuning using a Docker file. Using that image we will be launching the container for ML model deployment.
- As soon as the developer push the code to GitHub, pull the code from GitHub to Jenkins through poll SCM. It will automatically copy the code from Jenkins workspace to Mlops folder which created in Red Hat Linux.
- Check the code. If the code contain Deep Learning model like CNN launch container having preinstalled keras or launch the respective container (e.g Sci-kit Learn). Train the model and get the accuracy
- Find the accuracy of the model. If the accuracy is less than the threshold tweak the architecture by tuning hyper parameters and retrain the model until it achieve the desired accuracy.
- If the desired accuracy is achieved send a mail to developer indicating the status and accuracy of the model. Then, deploy the model in a container having preinstalled Flask and Launch the flask application for live.
- Monitor the model deployment. If the container stop due to any issue, relaunch the container from where it stopped previously.
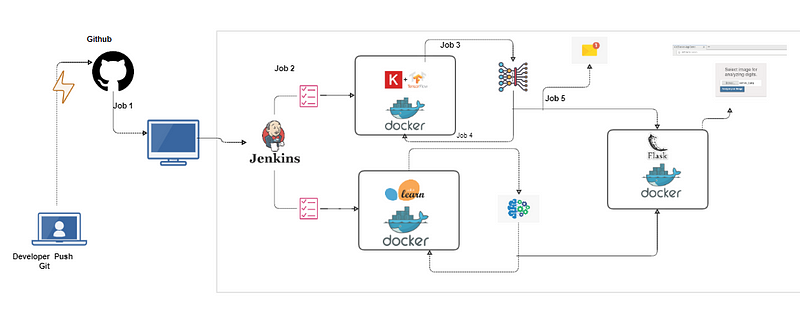
In the above architecture you can see the overview of complete task in a higher end. Here we are using Git, Jenkins, Docker and Flask to automate the task.
Why messing with all those theories. Lets start our hands dirty to automate the process.
Step 1: Create Docker-file for Deep-learning, Machine Learning and Flask application image with preinstalled python and libraries
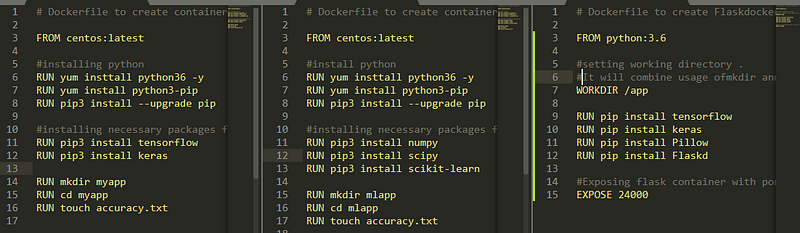
- After creation of Docker-file build the docker image using below code snippet.
docker build -t krsconimg:v1 /root/myap/docker/
- The above code will create a container image named krsconimg:v1 (Keras container for deeplearning) using dockerfile located at /root/myapp/docker/
docker build -t sklconimg:v1 /root/sklapp/docker/
- The above code will create a container image named sklconimg:v1 (Sklearn container for Machinelearning) using dockerfile located at /root/sklapp/docker/
docker build -t flaskdocker:v1 /root/mlops/docker/
- The above code will create a container image named flaskdocker:v1 (Flask container for deploying model) using dockerfile located at /root/mlops/docker/
Step 2 : Creation of Job 1 in Jenkins(Pull the model_build code from GitHub pushed by developer)
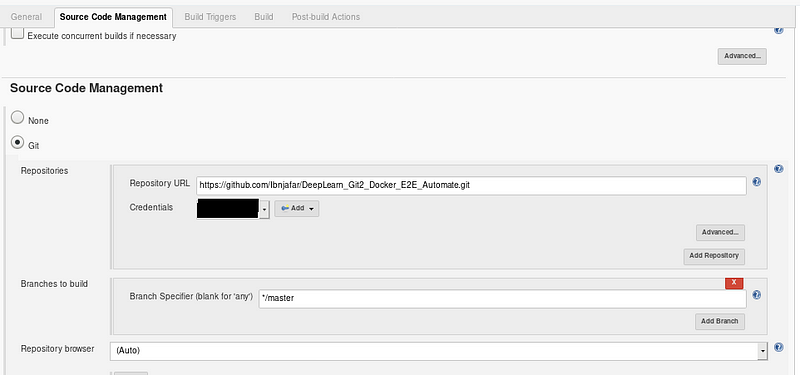
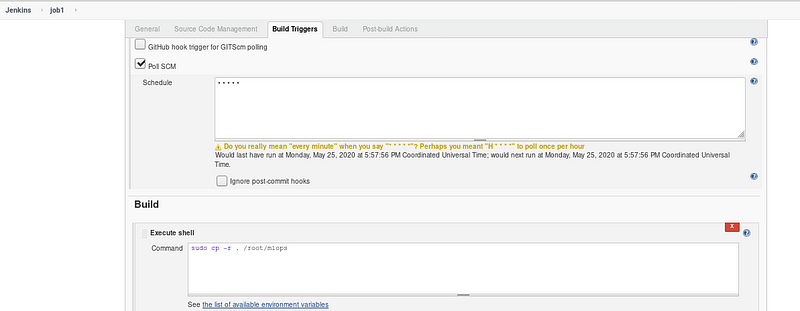
- PollSCM trigger keep on checking the GitHub repository, if any changes in the code it will automatically pull the code and copy it to /root/mlops directory.
- Here I am using mnist handwritten digits dataset for model creation due to its less weight and simplicity.
You can access the GitHub repository by clicking the link
Step 3 : Job 2 Checking copied code and launching respective container for model training

- As you can see, the job 2 will trigger only if Job 1 succeeds
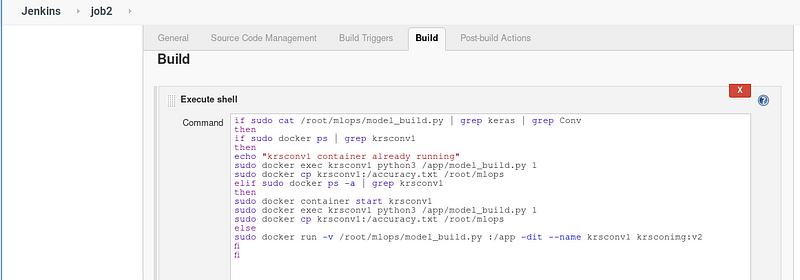
- Job 2 will check the code, launch the respective container, train the model and copy the accuracy to file accuracy.txt
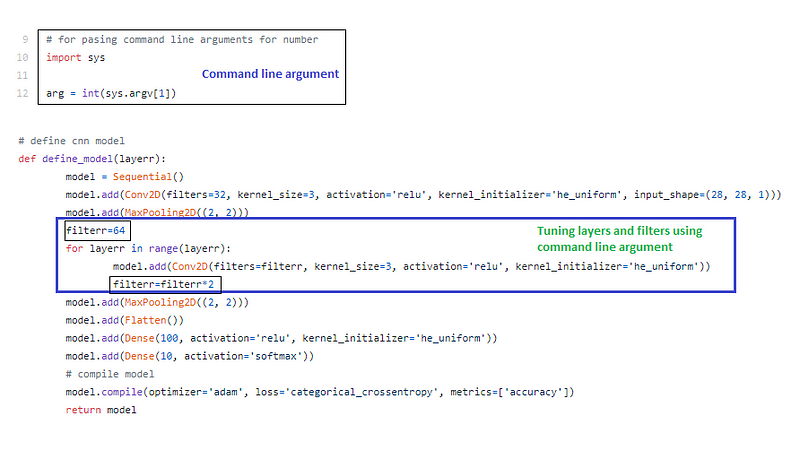
- In the model_build.py code, we are using command line argument to tune the model.
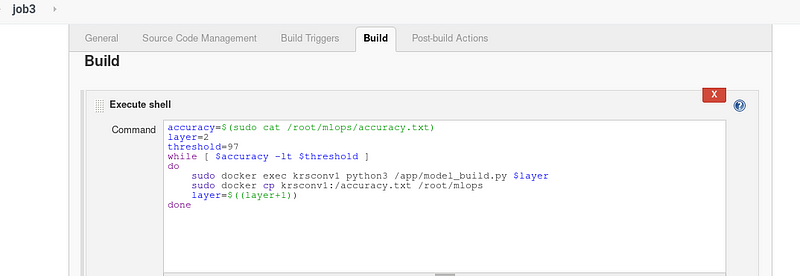
Step 4: Job 3 Compare the accuracy with threshold and tweak architecture if accuracy less than threshold
- This job will trigger only if the job 2 is successful.
Note : It is the more vital part of this automation. Tweaking the model architecture by adding layers and changing the filters in CNN.
Here I have set the threshold as 97 % . If the accuracy is less than threshold , it will tune the hyper-parameter by adding conv2d layer and change the filter by changing the command line argument like (1,2,3 etc.,). Refer Fig . 7
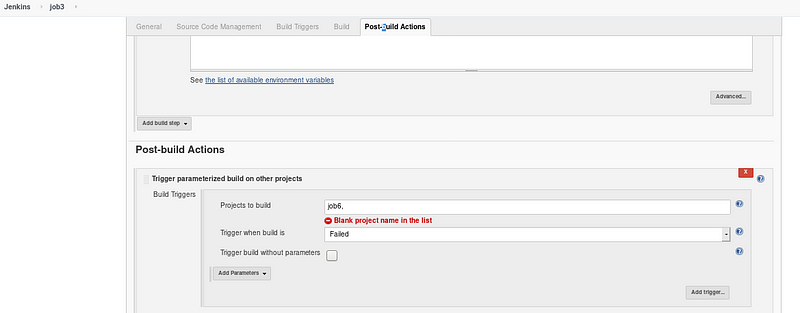
- If Job 3 fails, it will trigger Job 6
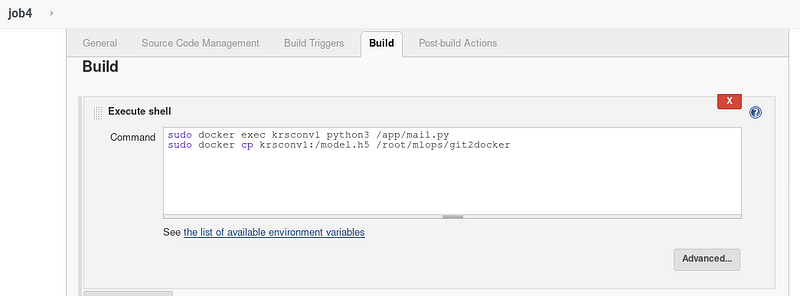
Step 5: Job 4 Send mail to developer stating the model accuracy, status and copy the model.h5(final model) to /root/mlops/git2docker
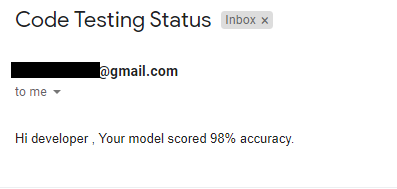
Copy of mail
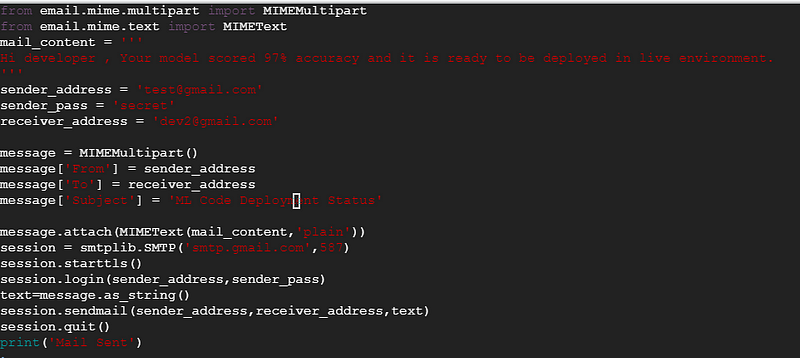
- When the model attains 97% accuracy, it will send a mail to developer like this
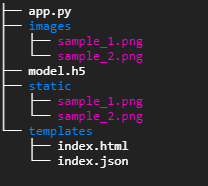
After copying the model.h5 to gi2docker (Flask application folder) the folder tree structure will look similar like this.
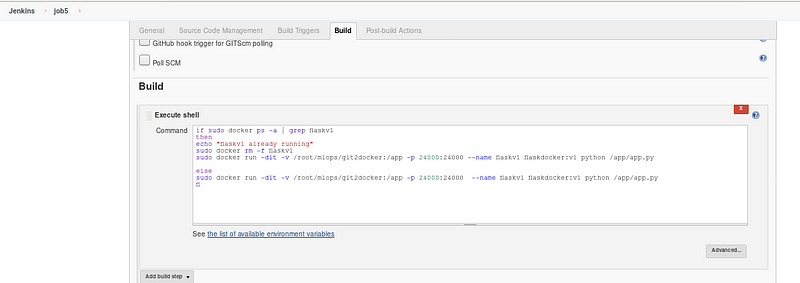
Step 6: Job 5 Deploy the final model in Flask application container and make it live
- After deploying the flask application in container flaskv1. We can access the application using URL http://127.0.0.1:24000/
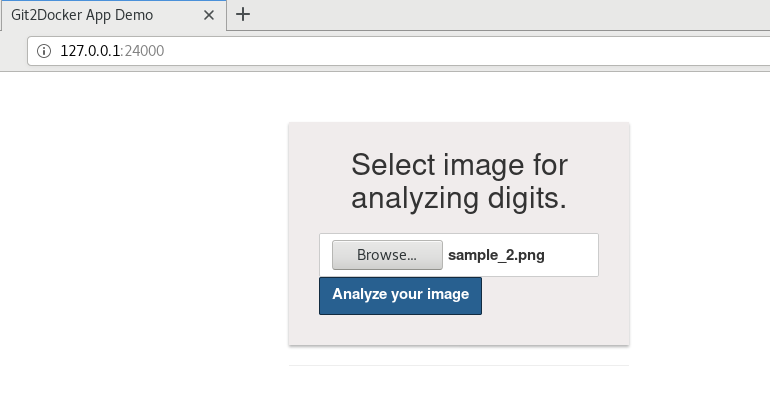
When you upload the image and press the analyze your image button our app will predict the result and it will appear similar to this

Step 7: Job 6 to monitor the krsconv1 and launch it if fails due to any issue
- Job 6 will keep on monitoring the krsconv1 and relaunch the container if it stops.

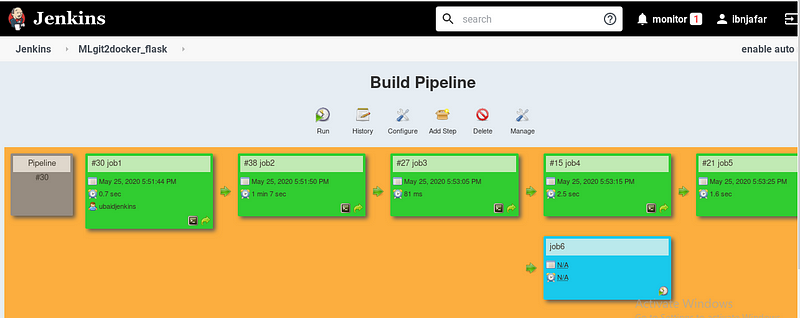
Overall Job-flow will look like this which can be visualized using build pipeline
Wrapping up:
In these article we have automated Mlops task using git, docker, Jenkins and flask. These flow can be furthered enhanced using Kubernetes and tuning hyper-parameter and testing codes with more conditions in Jenkins.
I hope you enjoyed this article. Please share your valuable feedback and collaborative ideas.
Keep Learning …..
Keep Sharing …..


No comments:
Post a Comment